
Project: Laser Cutter Redesign
Overview: The overall goal of this project is to completely redesign the laser cutter I built freshman year, to give me the tools needed to continue my current and future projects.
Project Criteria:
Must Haves:
Reduced Bed Size: ~1000mm X 500mm
Stiffer Y Axis
Mechanically constrained X axis
Proper electrical panel
Active laser cooling
Built in air-compressor and the option to use an external compressor
Easy to maintain
Should Have:
Frame dimensions must be less than 900x1300x650mm
Built-in ventilation system
Easily accessible mirror tuning
Nice to Have:
Glass/Acrylic to be able to watch the laser cutting
Sheet metal body panels

Build Updates


Build Update: 7/25/2025
One of the worst things about the last laser cutter was the electronics board. The wiring was disorganized, with power and signal lines tangled together haphazardly and everything crudely mounted on a simple wooden board. Not only did this make troubleshooting and maintenance a nightmare, but it also introduced unnecessary electrical noise and potential safety hazards. This time, I’m committed to doing things differently.
My plan is to use two large, dedicated electronic enclosures to neatly organize and protect all of the system’s electronics. The first enclosure will house all the control electronics, including the stepper motor drivers, the main laser control board, and any ancillary controllers or relays. The second enclosure will be dedicated to power, containing both the 24V supply for the control systems and the high-voltage 35KV power supply for the laser itself. To further improve safety and reliability, I’ll route all power and signal cables separately, with clearly defined paths running from the power supplies to the control electronics. Additionally, these paths will lead to robust external M10/12 connectors for easy interfacing with external components. This approach should result in a much cleaner, safer, and more maintainable electronics setup.
I also added a vent fan!


Build Update: 7/18/2025
I have tried so long to get this to work. I really like the idea of having invisible hinges for the front door of the laser cutter. Though after multiple days of scavenging the hardware store and McMaster, I couldn’t find anything that would work without heavy modification to the part or the aluminum extrusion.
In the end, this is probably a lesson in tempering my expectations and recognizing when something isn’t worth the time and effort invested. Ultimately, a standard hinge will work just as well and serve the same purpose, even if it’s a bit more visible.


Build Update: 7/13/2025
I’ve been trying to practice designing with sheet metal parts. Understanding the limitations of different materials and thicknesses, as well as the overall design philosophy of sheetmetal parts.
I added an adjustable mount for the Inductive proximity sensors that will act like limit switches for the build. While I could definitely just 3D print a bracket to hold a screw, I thought this was a neat way to reduce part count on the machine


Build Update: 7/10/2025
I decided to redesign the Y axis. The reasoning is that having the motors in line with the rails added almost 100mm of width to the Y-axis and, in turn, the machine. I also thought I could potentially remove the 20x40 extrusion because there is a lot of wasted space within and around the extrusion. While this large 1/4in aluminum plate will be more expensive, it will allow me to condense the height and width of the axis by 20mm, reduce the length by about 80mm, and decrease the overall weight of the grantry significantly.
I still need to add the ability to tension the belt and to mount the 2nd stage mirror but that will come soon.

Build Update: 6/29/2025
I decided against the chamfered edge. It added unnecessary complexity to the frame as well as increased the overall height of the machine. This is because I would have to compensate for the reduced height, so the Y-axis wouldn’t hit it too early. I also switched to a single 20x60 extrusion for each edge of the machine. It creates a siffer and simpler frame. I think it also looks better.

Build Update: 6/28/2025
I started working on the frame. I think it would be cool to add a chamfered edge to the frame, but i’m not completely sold
Build Update: 6/24/2025
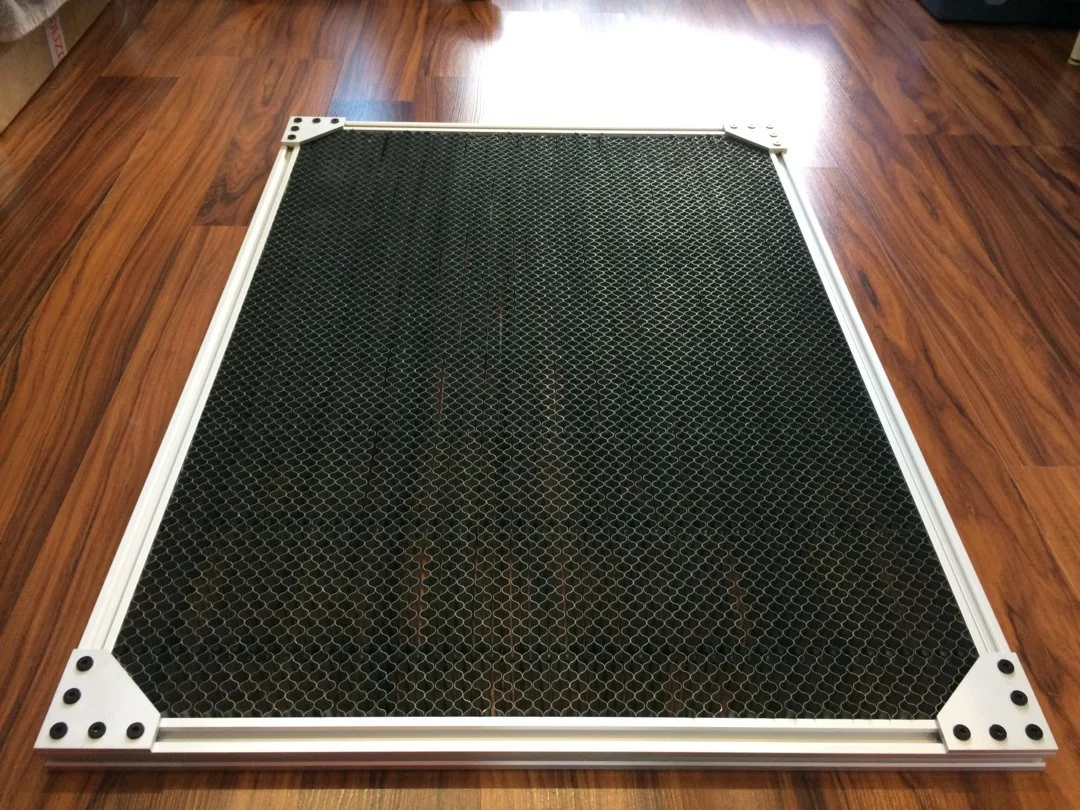
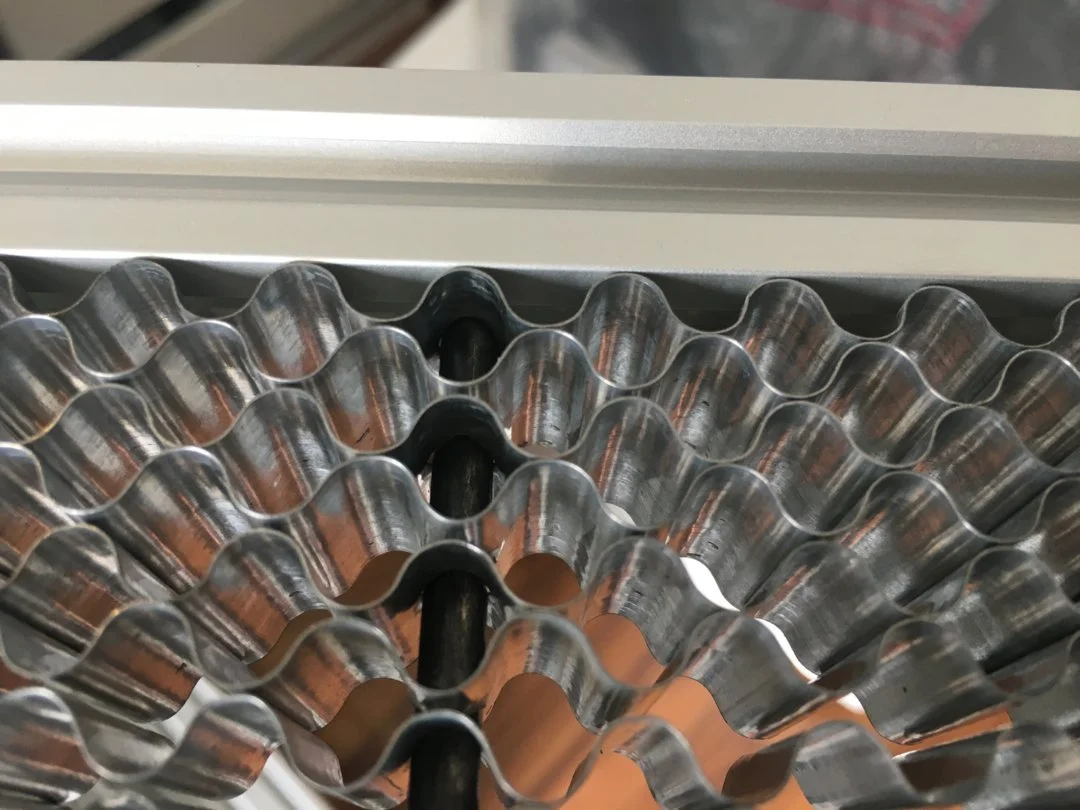
I found a really clever solution to my bed problem. I’ve been trying to find a solution for a cheap hex bed I could use. The ones on McMaster would work, but would also cost almost $400 for a 1000x500mm sheet, which is significantly out of my budget. That’s when I found this from LukasK on OpenBuilds. He bought two 500x500mm honeycomb beds from Amazon, cracked the case open, and slotted the guide rods between the aluminum extrusion. He created a 1000x500mm laser bed for sub $100. Incredible! So, I’m going to copy his design. Thank you, Lukas!


Build Update: 6/22/2025
The next thing I want to work on is the Y-axis. The original Y-axis had the stepper motor mounted to the head of the laser. For low-speed operations, this was ok, but it limited the maximum acceleration and deceleration, making engraving take significantly longer. This will complicate the design, but in the long term, will result in a better finished project
This new axis uses the same aluminum extrusion to cover the width and has bent aluminum plates. to mount the stepper motor, linear rail, and belts. The Y-axis linear rail is mounted directly to the extrusion.
This design is siffter, but I don’t like how much room the stepper and pulley are taking up in the work area. In turn, it’s making the machine wider than it needs to be. I think it would be neater to tuck them on top of or on the other side of the rail. That being said, I’m going to keep the design for now and continue on.

Build Update: 6/21/2025
Today is the day I start redesigning the laser cutter I built freshman year. For a bit of context, there wasn’t much thought put into the original design other than let’s make it as big as possible (I was younger and naive).
The first thing I want to work on is replacing all the v-groove wheels with linear rails to improve the stiffness of the base gantry. One of the biggest problems with the original machine was that the laser misaligned as it moved along an axis because the grantry mounts themselves would flex.